Long layers are the ultimate way to breathe life into length without sacrificing the inches you’ve worked so hard to grow. By strategically removing weight and adding dimension, layered cuts provide movement, volume, and that coveted “lived-in” texture that makes hair look polished even on its most natural days. Whether your hair is stick-straight, wavy, or full of curls, the right layering technique can transform your look, frame your face, and simplify your styling routine.
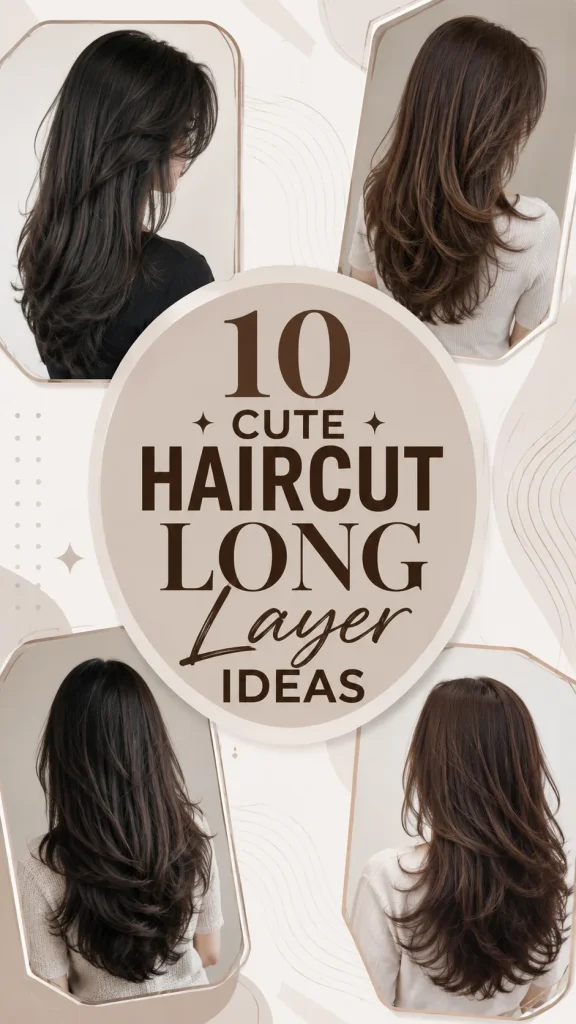
Choosing the right cut involves deciding where you want the focus to be—do you want to highlight your cheekbones with shorter, face-framing pieces, or do you prefer a seamless flow of movement throughout the length? The following ten ideas cover a variety of styles, from modern, edgy shags to classic, soft blends, all designed to make your long hair the star of the show.
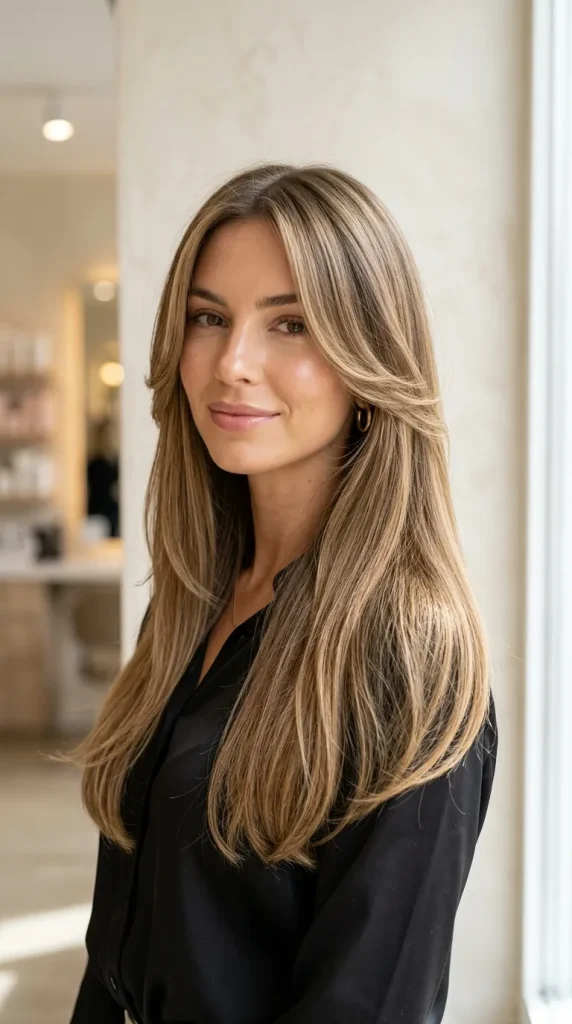
1. The Classic Face-Framing Blend
This is the gold standard for long hair. By incorporating soft, shorter layers that begin around the chin or collarbone and graduate into the longer length, you create a natural frame for your face. This cut is incredibly flattering because it draws attention to your best features—your eyes and jawline—while keeping the rest of your hair long and luxurious. It’s perfect for those who want a change that feels fresh but remains within the “safe” zone of timeless style.
How to Make
Have your stylist use a point-cutting technique to ensure the ends of the layers are soft and wispy rather than blunt. The transition should be gradual, starting just below the chin, to avoid a “shelf” effect. To style, use a medium-sized round brush to blow-dry the face-framing layers inward, which highlights the shape and adds a soft, romantic curve. Finish with a lightweight smoothing serum to keep the hair looking hydrated and frizz-free.
Things Needed
- Professional point-cutting shears
- Medium-sized round brush
- Hairdryer with a concentrator nozzle
- Lightweight smoothing serum
- Sectioning clips
2. The Modern “Butterfly” Cut
The butterfly cut has taken the beauty world by storm, and for good reason. It features very short, wispy layers around the crown and longer layers throughout the length. This creates the illusion of a shorter cut at the top (giving you incredible volume and bounce) while maintaining long, flowing length at the bottom. It is the ultimate style for anyone with fine hair who struggles with flatness, as it gives you a dramatic, high-fashion silhouette without sacrificing your overall length.
How to Make
Ask your stylist to create “over-directed” layers, which result in shorter pieces at the top that can be styled away from the face. The key here is the technique: the top section should be cut to look almost like a shaggy bob when styled independently. When blow-drying, use a large round brush to lift the roots and flip the ends of these top layers away from your face to achieve that signature “winged” butterfly effect. Use a light-hold volumizing spray at the roots for extra lift.
Things Needed
- Large round brush
- Volumizing root lift spray
- Texturizing shears
- Professional haircutting scissors
- Hairdryer with diffuser

3. The Long, Textured Shag
If you want something a bit edgier and more effortless, the long shag is a brilliant choice. It focuses on heavy internal texture and piecey ends, moving away from the “perfectly blended” look toward something more organic and rock-and-roll. This cut works beautifully with natural waves or curls, as it allows your hair’s natural pattern to come out and play. It is a very low-maintenance style that looks just as good air-dried as it does professionally styled.
How to Make
The shag relies on a razor or thinning shears to create jagged, textured ends. Ask for layers that start relatively high up—around the cheekbones—and continue down the entire length. When styling, skip the brush. Apply a curl-enhancing cream or texturizing mousse to damp hair and let it air-dry. Once dry, use a small amount of pomade on your fingertips to define the ends of the layers, giving the style that messy, “just-got-out-of-bed” aesthetic that is the hallmark of the shag.
Things Needed
- Razor or texturizing shears
- Curl-enhancing cream or texturizing mousse
- Pomade for defining ends
- Wide-tooth comb

4. The Soft, Hidden Layers
Sometimes you love the look of a blunt, one-length cut but find it too heavy or difficult to manage. This is where hidden or “internal” layers come in. By cutting shorter layers underneath the top section of your hair, you reduce the bulk and weight without creating visible, choppy layers on the surface. This cut is perfect for thick, coarse hair that tends to feel like a heavy weight on your shoulders, giving it much more movement and airiness while preserving the illusion of a sleek, solid length.
How to Make
Ask your stylist for “invisible” layers throughout the interior of the hair. They should use thinning shears to remove weight from the middle sections, starting about three or four inches from the ends. Keep the top layer and the perimeter blunt. When styling, a flat iron is your best tool. Straighten the hair until it is sleek, which allows the lighter interior layers to give the hair a more natural, swinging movement as you walk.
Things Needed
- Professional thinning shears
- High-quality flat iron
- Heat-protectant spray
- Paddle brush for smoothing

5. The V-Cut with Cascading Layers
A V-cut is designed to taper your hair into a point at the back, which is incredibly elegant and dramatic. When you add cascading layers—layers that start from the shortest point at the front and get progressively longer until they hit the point of the V—you create a beautiful, waterfall effect. This cut is perfect for very long hair, as it highlights the length while ensuring the hair doesn’t look like a solid curtain. It’s a very feminine and romantic shape that looks stunning in photos.
How to Make
The cut requires a precise graduation technique. Your stylist should cut the hair in a V-shape at the back, then add long, blended layers starting from your collarbone down to the ends. When styling, a large-barrel curling iron is perfect. Curl the hair in large, loose sections, alternating the direction of the curls. This movement will show off the different lengths of the layers, making the V-shape more pronounced and visible.
Things Needed
- Large-barrel curling iron (1.5 inch)
- Precision haircutting shears
- Finishing spray
- Sectioning clips

6. The “Invisible” Long Layers
If you are terrified of losing your length or having choppy layers that take forever to grow out, ask for “invisible” long layers. These are extremely subtle, starting almost at the very ends of your hair. They aren’t meant to change the shape or add volume at the top; instead, they are meant to soften the ends and prevent the hair from looking “stringy” or dry. It is a fantastic option for those with fine or fragile hair who want to keep the density of their ends as thick as possible while still adding a touch of movement.
How to Make
Request that the layers begin at least 6 to 8 inches from the bottom. The stylist should use a point-cutting technique, cutting vertically into the hair rather than across, to keep the edges soft. When styling, a simple blowout with a large paddle brush is all you need. Focus on creating a smooth, healthy surface. The layers will provide just enough movement to make the hair feel alive without sacrificing the thickness of your ends.
Things Needed
- Professional haircutting scissors (for point cutting)
- Large paddle brush
- Blow-dryer
- Shine spray for the finish

7. The Deep Side-Parted Layered Cut
This cut is all about the “swoop.” By having your layers cut specifically to accommodate a deep side part, you can create massive, glamorous volume at the crown. The layers are cut longer on the side you flip your hair over to, creating a long, sweeping bang-like effect that frames the face and adds a touch of retro-inspired glamour. This is an excellent choice for anyone who wants a “red carpet” feel in their everyday life.
How to Make
Your stylist should cut the hair while it is parted in the deep side-part style you intend to wear. The layers on the “heavy” side should start around the cheekbone, while the layers on the “light” side can be longer. When styling, use a root-lift spray and blow-dry the hair in the opposite direction of the part to create maximum height at the crown. Once dry, flip it over. This technique creates a voluminous, long-lasting lift that is very flattering for round and oval face shapes.
Things Needed
- Deep side-part styling
- Root-lift volumizing spray
- Large round brush
- Professional haircutting shears

8. The U-Shaped Layered Cut
The U-shaped cut is the softer, more wearable cousin of the V-cut. Instead of tapering to a sharp point, the hair is cut in a rounded, U-shaped perimeter that mimics the natural flow of your shoulders. The layers are then blended throughout the U-shape, creating a very soft, rounded silhouette. This cut is incredibly low-maintenance and works well for almost every hair texture. It provides enough layers to create movement but maintains a thick, healthy appearance at the ends.
How to Make
Ask your stylist for a rounded perimeter. The layers should be concentrated around the back and the sides, following the U-shape. To style, use a medium-sized hot-air brush. Curling the ends slightly under helps emphasize the rounded shape of the cut. This is a very “clean” and classic look that never goes out of style and is easy to maintain with trims every 8–10 weeks.
Things Needed
- Hot-air styling brush
- Professional shears for rounded perimeter
- Detangling mist
- Smoothing cream

9. The Long Bob with “Grow-Out” Layers
If you have a lob that has grown out, you have the perfect base for this style. “Grow-out” layers are long, blended, and seamless. They are the antithesis of the choppy shag. This cut is perfect for the “minimalist” who wants to wake up, brush their hair, and go. It’s elegant, professional, and provides just enough layering to keep the hair from feeling heavy or boxy.
How to Make
Have your stylist blend your existing length with long, soft layers that start near the collarbone. The goal is to make the layers so seamless that you can barely tell where the shorter hair ends and the long hair begins. To style, let your hair air-dry until it is 80% dry, then use a large round brush to smooth the ends for a polished, “I didn’t try too hard” look. Use a lightweight finishing oil to define the ends.
Things Needed
- Large round brush
- Lightweight finishing oil
- Professional haircutting scissors
- Blow-dryer

10. The Curly/Wavy Long Layered Cut
If you have naturally curly or wavy hair, you need a different approach. Standard layers can often make curly hair look frizzy or “triangular” if they aren’t placed correctly. A curly long-layered cut uses “internal” shaping to maintain the weight of the curls, allowing them to stack beautifully without becoming a giant puffball. This cut defines your curls, adds bounce, and prevents your hair from looking bottom-heavy.
How to Make
Your stylist should cut your hair while it is dry, or at least cut it with the knowledge of how your hair “springs” back. Ask for longer layers to keep the weight of the curls from expanding too much. Avoid heavy thinning, as this can lead to frizz. When styling, apply your leave-in conditioner and curl cream to soaking-wet hair, then use a diffuser to dry. The layers will help each curl stand out, giving you a full, bouncy look that stays defined all day long.
Things Needed
- Leave-in curl cream
- Diffuser attachment for hairdryer
- Wide-tooth comb
- Professional haircutting shears (for dry cutting)

Tips for Maintaining Your Layered Cut
- Don’t Over-Trim: Layers grow out at different rates. If you trim your hair too often, your layers might lose their shape. Aim for a professional dusting every 8 to 12 weeks.
- Hydrate the Ends: Because layers have “exposed” ends, they are more prone to splitting than one-length hair. Use a deep conditioning mask once a week to keep the ends of your layers soft and smooth.
- Invest in the Right Brush: If you have layers, a round brush is your best friend. It allows you to style the layers individually, which is the secret to getting that bouncy, professional salon look at home.
- Texture is Your Friend: Don’t be afraid to embrace a bit of texture. Layers are designed to move; if your hair feels too “stiff,” it probably needs a light texturizing spray to help the layers separate and flow naturally.


Leave a Reply