Apartment living has a way of making every object feel louder. A single pair of shoes by the door can look like a pile, and a few extra mugs can make a kitchen cabinet feel jammed. The good news is that you do not need a renovation, a huge budget, or a landlord’s permission to bring calm to a compact home. With a few smart measurements, renter-friendly hardware, and a free afternoon, you can turn awkward corners, blank walls, and overlooked doors into hardworking storage.
These 10 DIY small space organization ideas for apartments are designed for real life. They work in studios, one-bedrooms, shared flats, and any rental where you want storage that can move with you. Some take twenty minutes. Others are weekend projects. All of them help you use vertical space, hide clutter, and create zones that make your apartment feel larger and more intentional.
You will not need a workshop full of tools. Most projects rely on items you can find at a hardware store, thrift shop, or online for a reasonable price. The goal is not a showroom. The goal is a home where your keys have a spot, your cleaning supplies stop falling over, and your closet stops feeling like a game of Tetris. Pick one idea, personalize it, and watch how much lighter your space feels.
Quick Answer: The best 10 DIY small space organization ideas for apartments use vertical storage, hidden zones, and multi-purpose pieces. Start with over-the-door organizers, tension rods, under-bed rolling bins, floating shelves, magnetic tins, pegboards, stackable crates, fold-down desks, and labeled rolling carts. Measure first, choose renter-friendly anchors or adhesive hooks, and label containers so everyone can maintain the system. Most projects cost under $40 and take an afternoon or a weekend.
1. Over-the-Door Pocket Organizer for Everyday Clutter
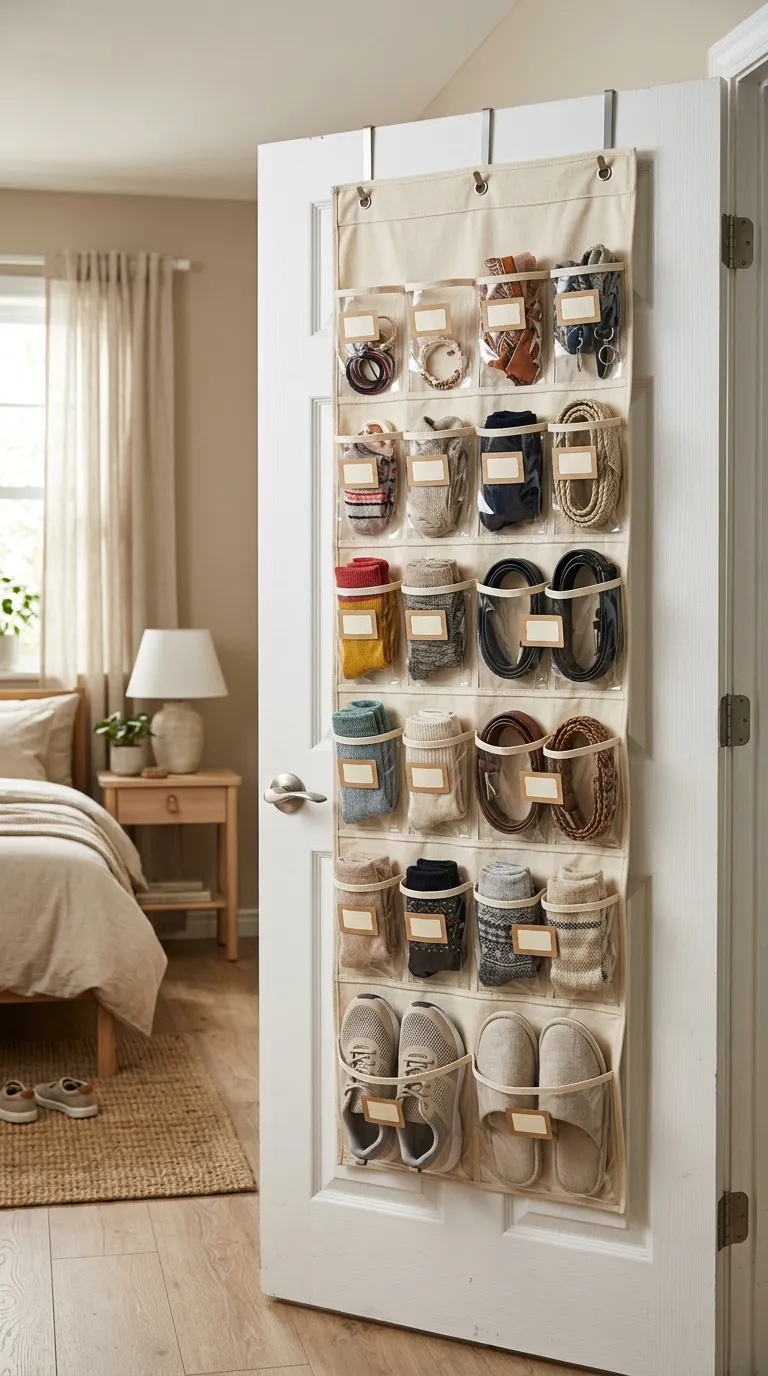
Doors are some of the most underused storage real estate in an apartment. An over-the-door pocket organizer can hold shoes, cleaning rags, pet supplies, craft tools, or bathroom essentials without taking up floor space. Choose a fabric organizer with clear pockets if you want to see what is inside, or a canvas version if you prefer a softer look.
Materials: over-the-door organizer, adhesive hooks or over-door brackets, small labels, optional baskets or bins for bulky items.
Instructions: Measure the door height and width before buying. Hang the organizer over the top of the door, or use adhesive hooks if the door gap is too tight. Fill the pockets from top to bottom, placing lightweight items higher and heavier items lower. Add labels to keep categories clear.
Time: 15–30 minutes. Difficulty: Beginner.
Customize this project by using it in different rooms. In a bathroom, fill it with hair tools, towels, and travel bottles. In a bedroom, use it for socks, belts, and accessories. In a kitchen, store takeout menus, reusable bags, and cleaning cloths. A budget-friendly alternative is a clear shoe organizer from a discount store, which often costs less than a dedicated closet system.
Common mistake: Overloading the pockets. If the door will not close or the organizer sags, remove heavy items and redistribute them. For renters, adhesive hooks designed for damage-free removal are a smart choice.
💡 Pro Tip: Label the pockets by category, not by item. “Chargers,” “Pet,” and “Cleaning” are easier to maintain than a long list of specific objects.